A factory reset clears the dongle's stored settings and paired device history, returning it to a clean working state. Follow the steps below for your phone type.
9Steps
~5Minutes
iOSPhone type
iOS · Android coveredStill stuck? WhatsApp support
Over time, a dongle can lose its configuration or get stuck in a state where it no longer works as expected. A factory reset clears everything back to default and usually resolves the problem within minutes.
Use this guide when…
The dongle is plugged in but the AACP page never appears on the IHU
The IHU detects the dongle as a USB media device instead of launching Android Auto or Apple CarPlay
The dongle was paired to a different phone and needs to be re-linked to yours
Android Auto or Apple CarPlay repeatedly fails to connect even though the dongle is detected
The dongle becomes unresponsive after an unexpected shutdown or power interruption
Part 1 — Connect to the dongle
1
Power up the dongle
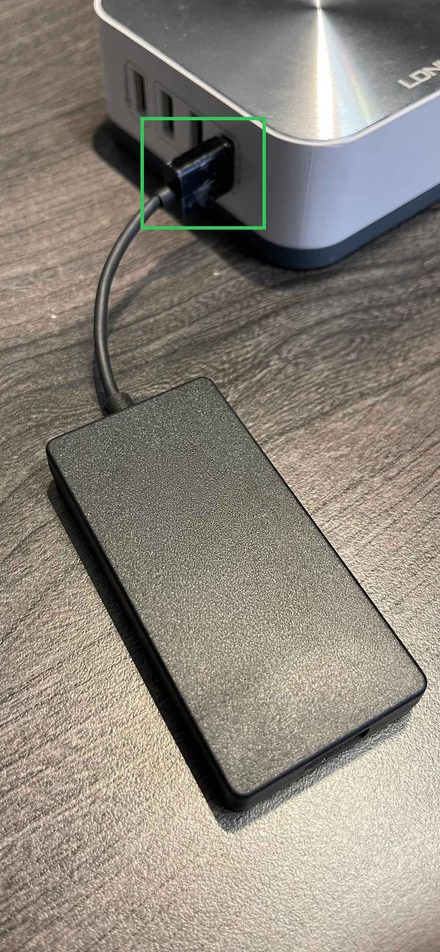
Plug your dongle into any USB-A port that supplies standard power — your IHU's USB-A port, a USB wall charger, or a USB hub will all work. Make sure the connection is secure. The dongle will begin its startup sequence automatically.
2
Wait for the red LED
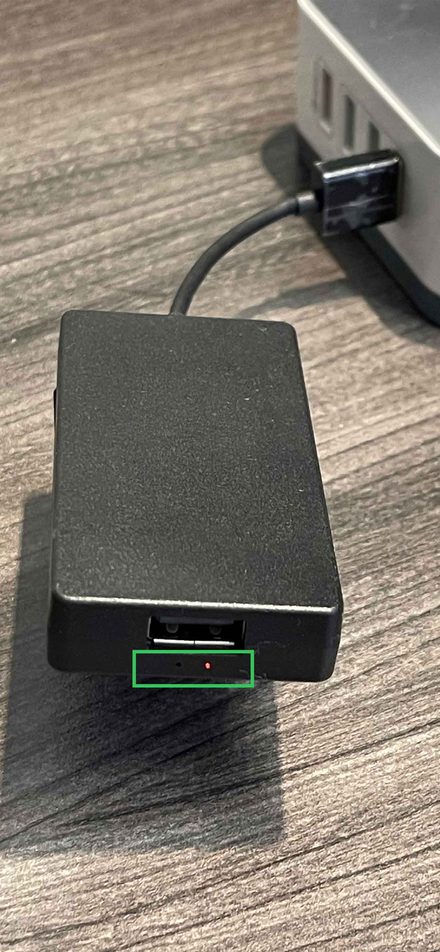
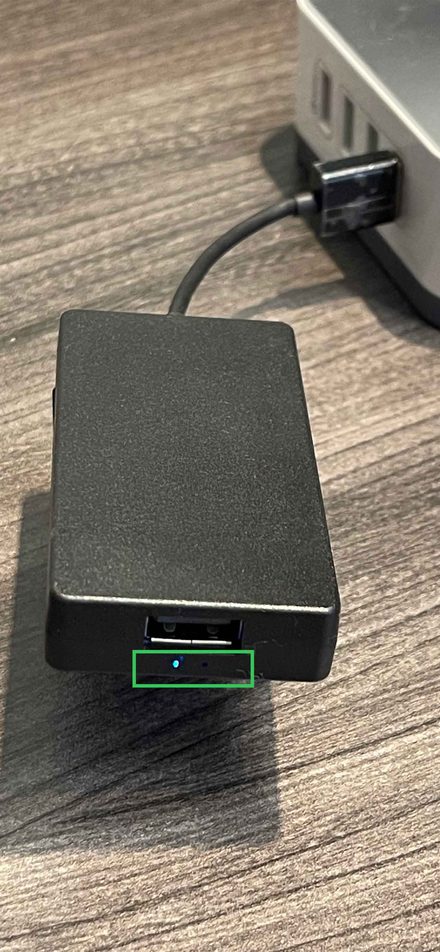
Watch the small LED indicator on the front of the dongle. Wait until it glows a solid, stable red — this confirms the dongle has finished booting and is now broadcasting its own Wi-Fi hotspot. Do not proceed until the red light is steady. It may take up to 30 seconds.
3
Connect your iPhone to the dongle's Wi-Fi
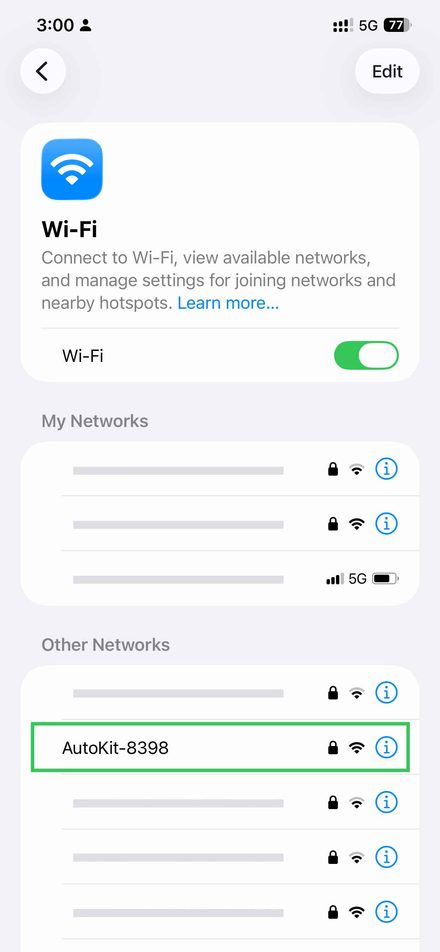
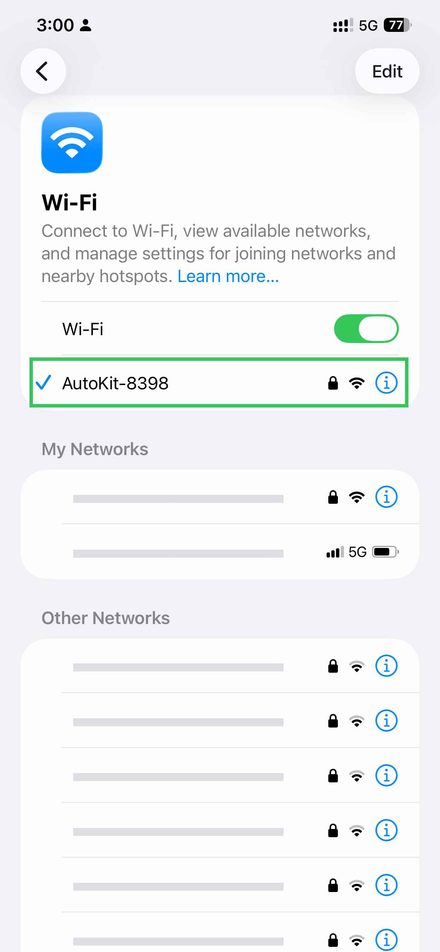
On your iPhone, open Settings → Wi-Fi. Under Other Networks, find the dongle listed as AutoKit- or AutoBox- followed by a 4-digit number (e.g. AutoKit-8398 or AutoBox-8398). The number will differ on your unit. Tap it to begin connecting.
4
Enter the Wi-Fi password
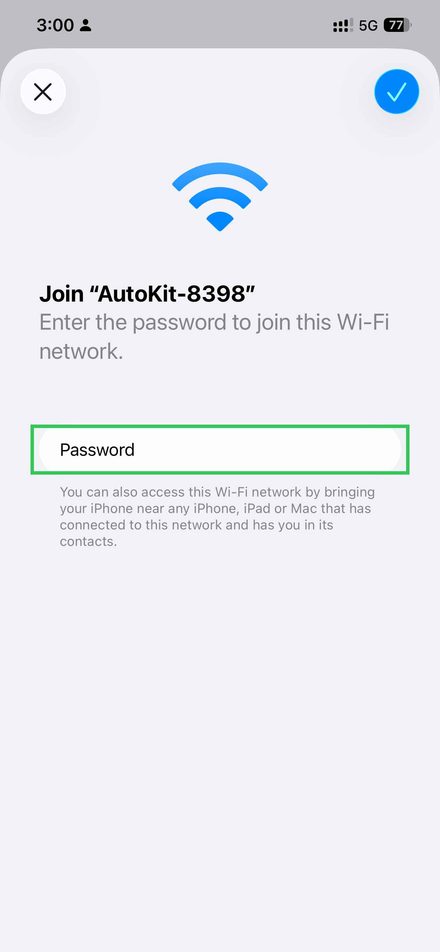
When the password prompt appears, type 12345678. This is the factory default password used on all AACP dongles. Tap Join to connect.
5
Confirm your iPhone is connected
Once the password is accepted, a blue checkmark will appear next to the AutoKit network at the top of the Wi-Fi list. This confirms your phone has successfully joined the dongle's hotspot.
6
Dongle LED changes to blue or green
Simultaneously, the LED on the dongle shifts from red to blue (or green on some units). This colour change confirms a phone is now connected to the dongle's Wi-Fi and you are ready to access its settings page.
Part 2 — Reset the dongle
7
Open the dongle's settings page in Safari
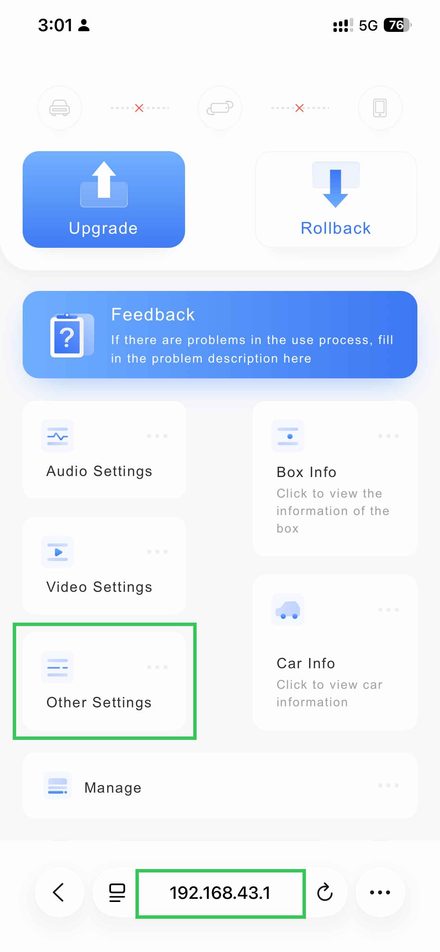
Open Safari and navigate to 192.168.43.1. The dongle's configuration portal will load. On the main screen, scroll down and tap Other Settings.
8
Tap Reset
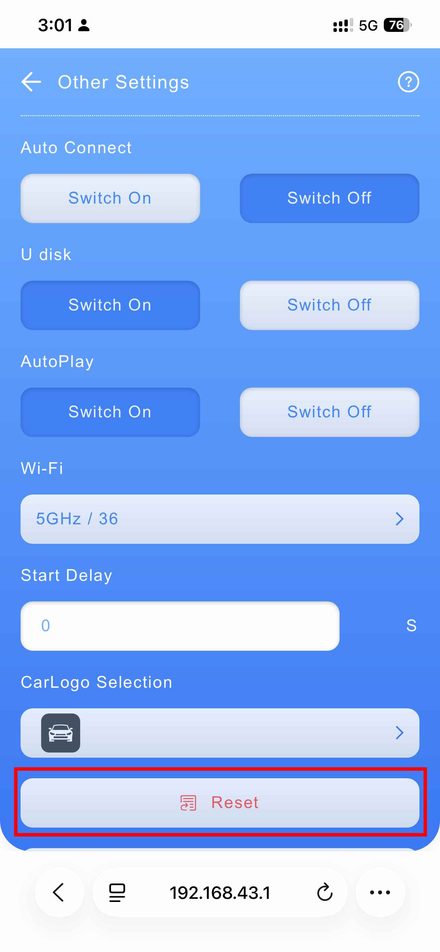
Inside Other Settings, scroll to the very bottom. You will see a Reset button displayed in red. Tap it to initiate the factory reset.
9
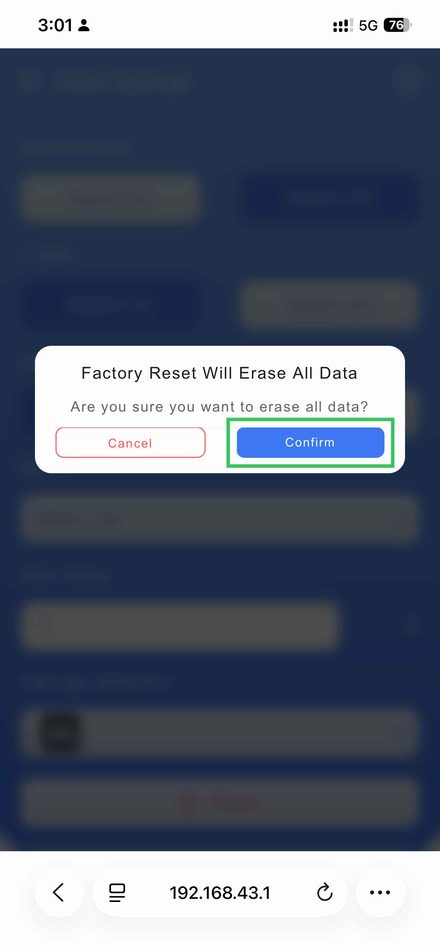
Confirm the factory reset
A dialog will appear: "Factory Reset Will Erase All Data — Are you sure you want to erase all data?" Tap Confirm. The reset begins immediately.
⚠️Do not unplug the dongle during the reset. Once you tap Confirm, the LED will go dark briefly as the dongle restarts — this is normal. Wait until the red LED is fully stable and solid before removing the dongle from the USB port.
✅Your dongle has been successfully reset. All previous pairing data is cleared. On your next drive, re-pair your phone to the dongle via Bluetooth and Wi-Fi just as you did during the initial setup. Once paired, your AACP connection should work correctly.
Part 1 — Install AutoKitools
1
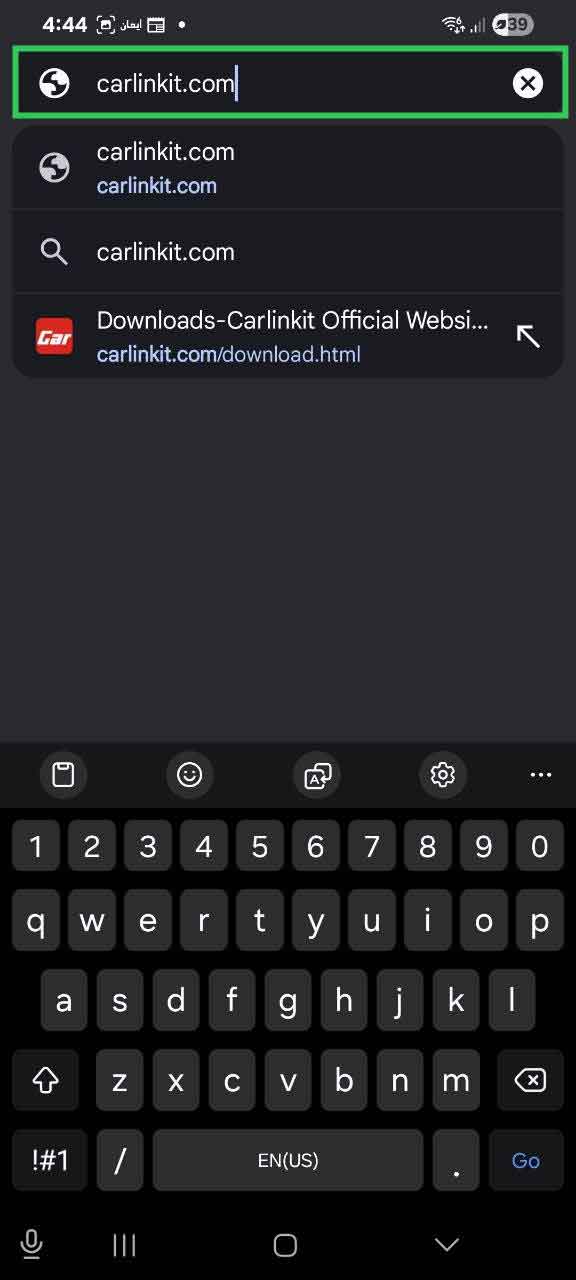
Open Chrome and go to carlinkit.com
On your Android phone, open Chrome and type carlinkit.com in the address bar. Tap Go on the keyboard to load the official Carlinkit website.
2
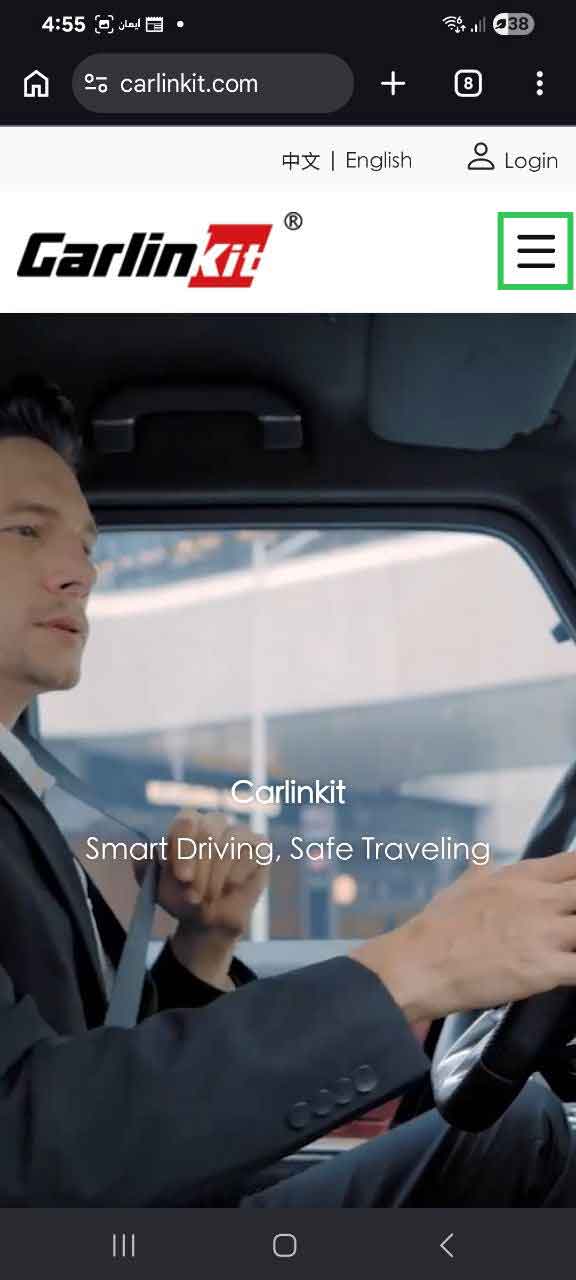
Open the website menu
Once the page loads, tap the menu icon (three horizontal lines, or hamburger icon) in the top-right corner of the page to expand the site navigation.
3
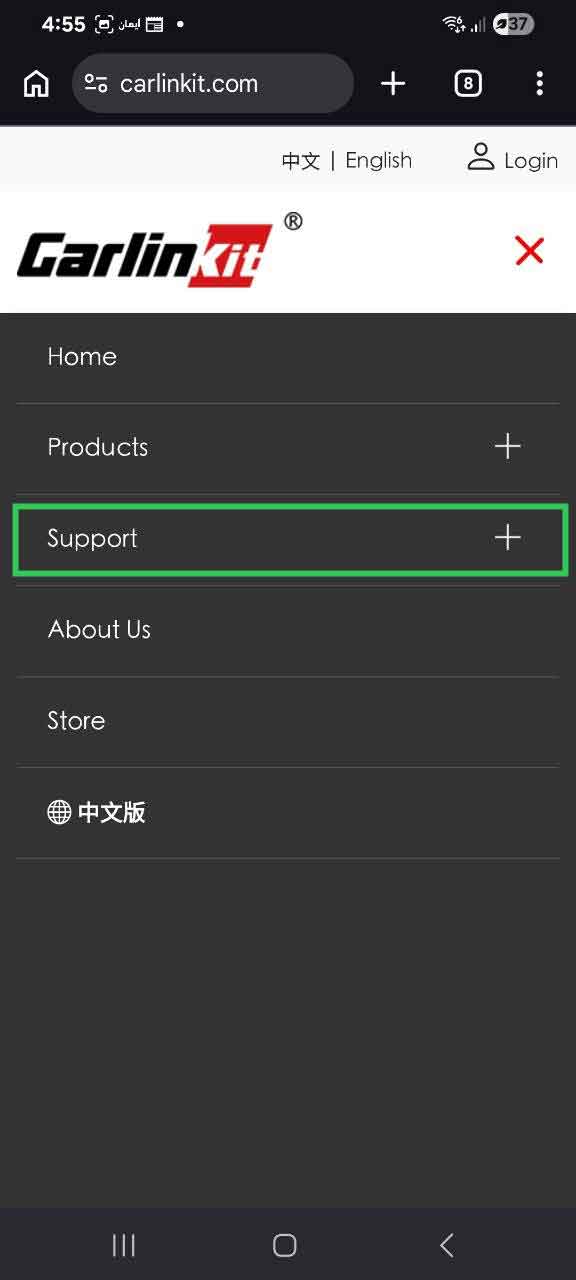
Tap Support
From the navigation menu, tap Support to go to the support and downloads section of the Carlinkit website.
4
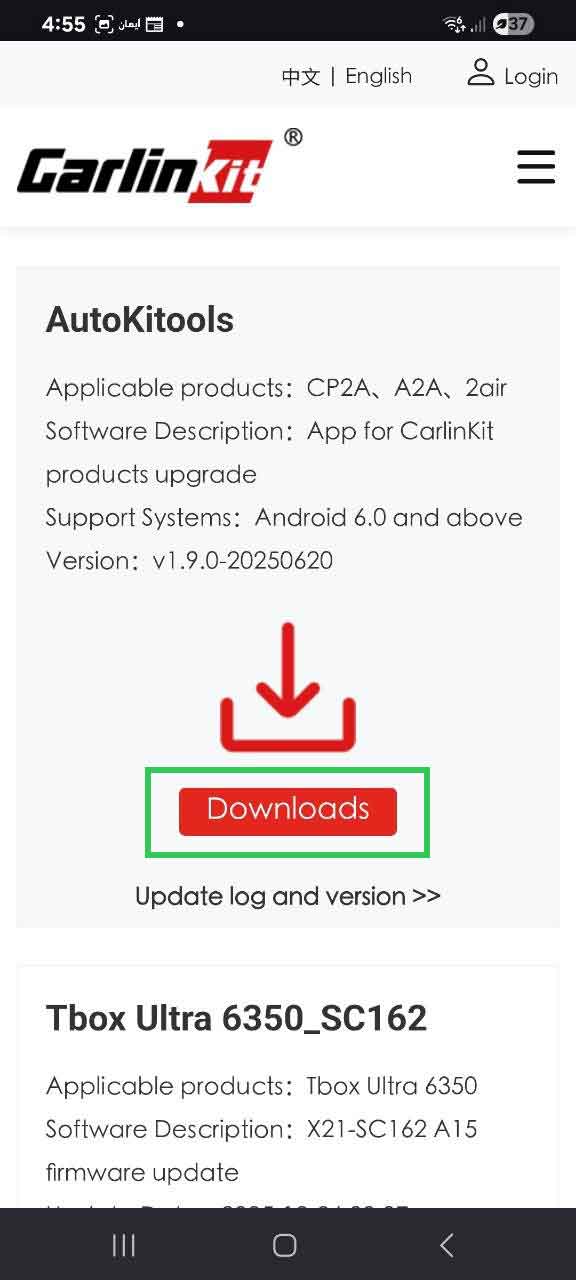
Find AutoKitools and tap Download
Scroll down the Support page until you find AutoKitools. This is the companion app used to configure and reset your dongle. Tap Download to begin downloading the installer file (APK) to your phone.
5
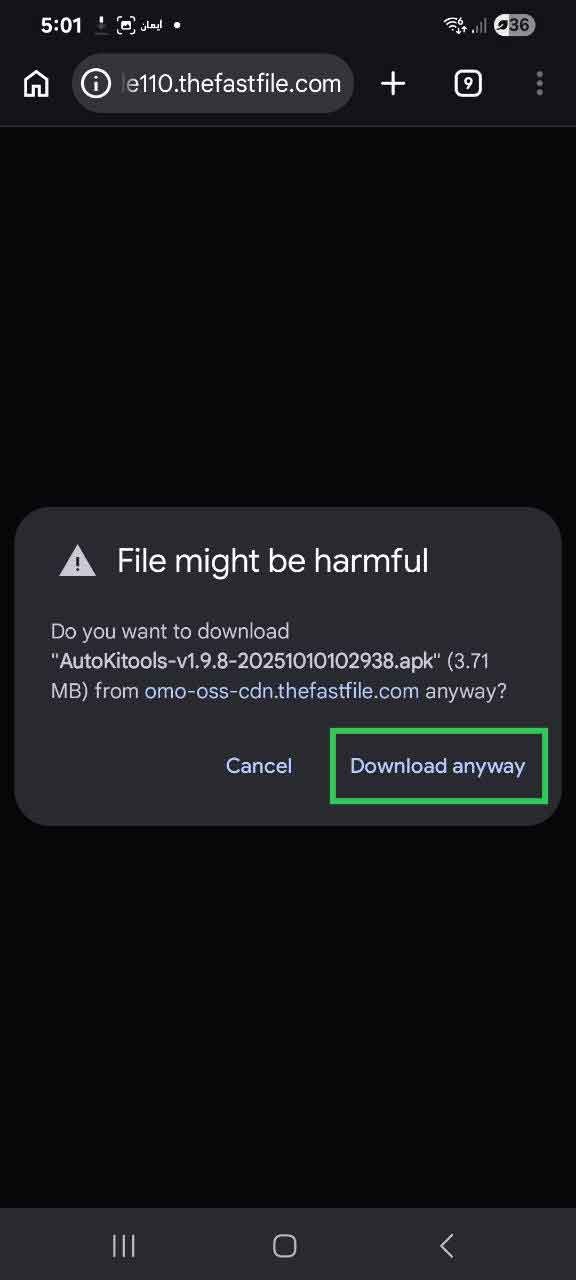
Confirm the download
Chrome may warn that the file type could be harmful because it's an APK downloaded outside the Play Store. This is expected. Tap Download Anyway to proceed — the file is safe.
6
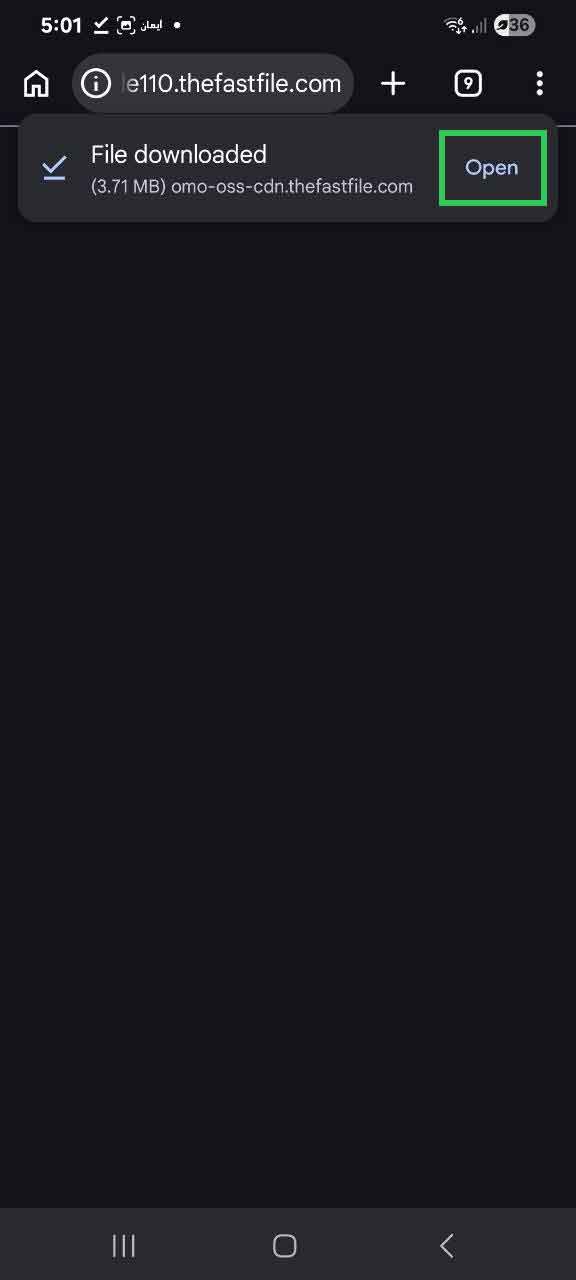
Open the downloaded file
Once the download is complete, a notification will appear at the bottom of the screen. Tap Open to launch the APK installer.
7
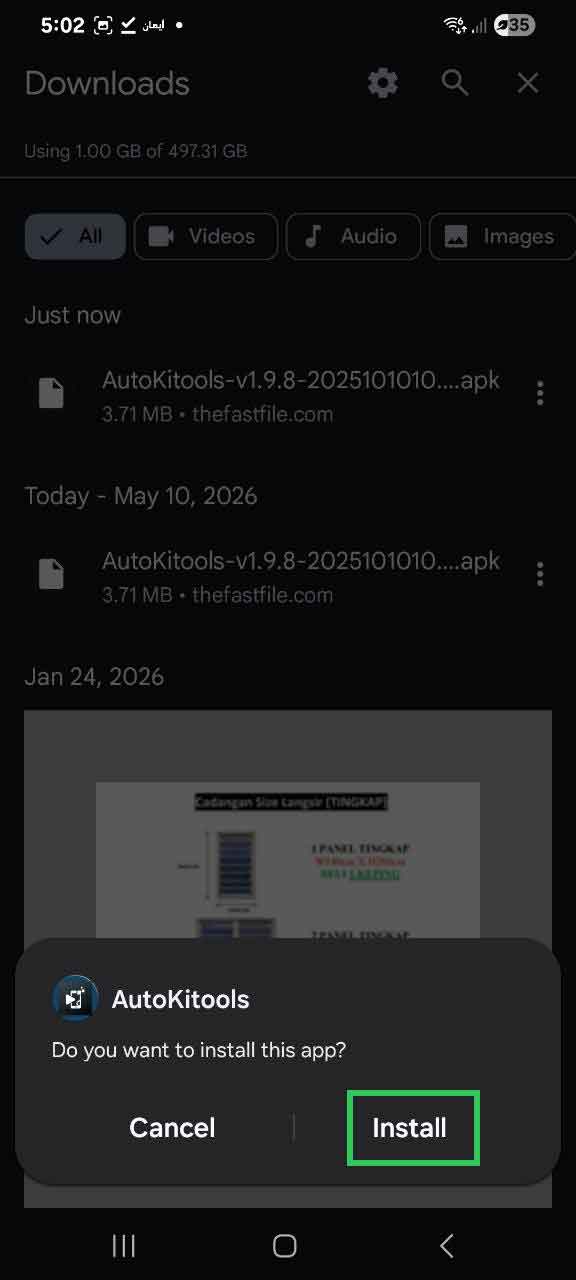
Tap Install
The Android installer screen will appear showing the AutoKitools app details. Tap Install to begin installing it onto your phone.
8
Confirm installation from unknown source
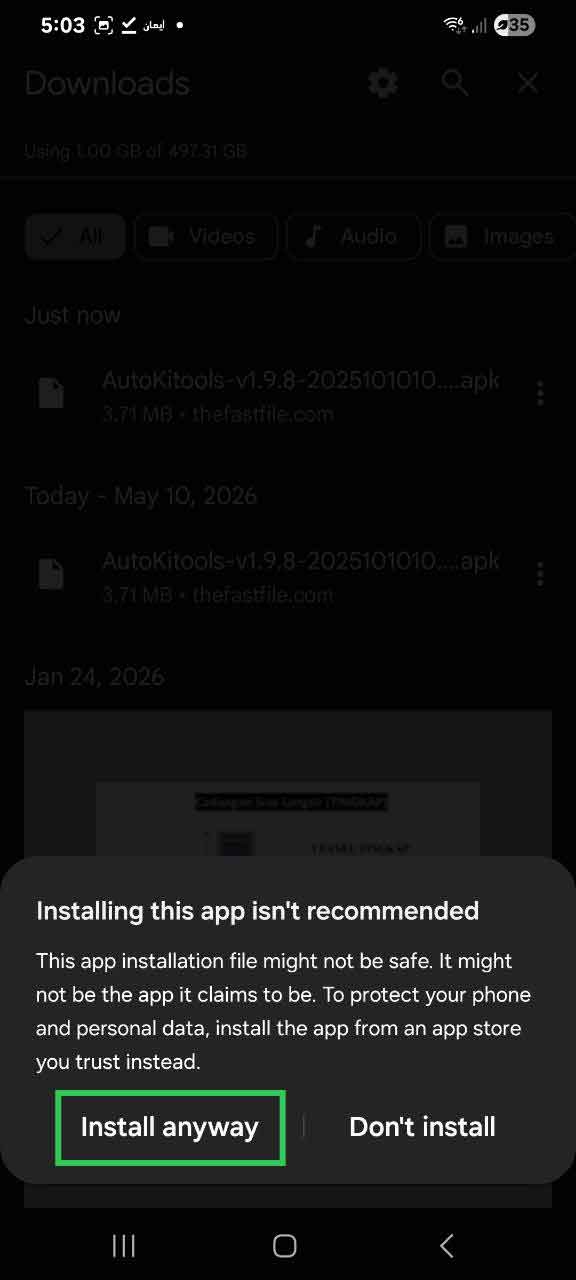
Android may display a security warning because the app was not installed from the Play Store. Tap Install Anyway to confirm. This warning is standard for any APK installed directly from a website.
9
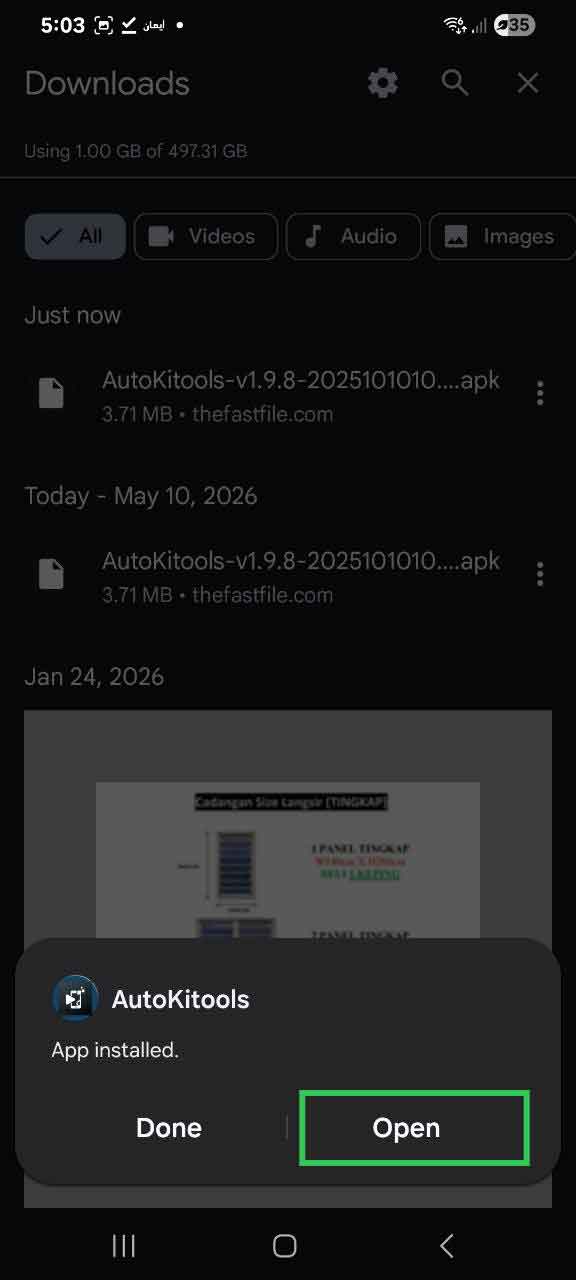
Open AutoKitools
Once installation is complete, tap Open to launch AutoKitools for the first time.
10
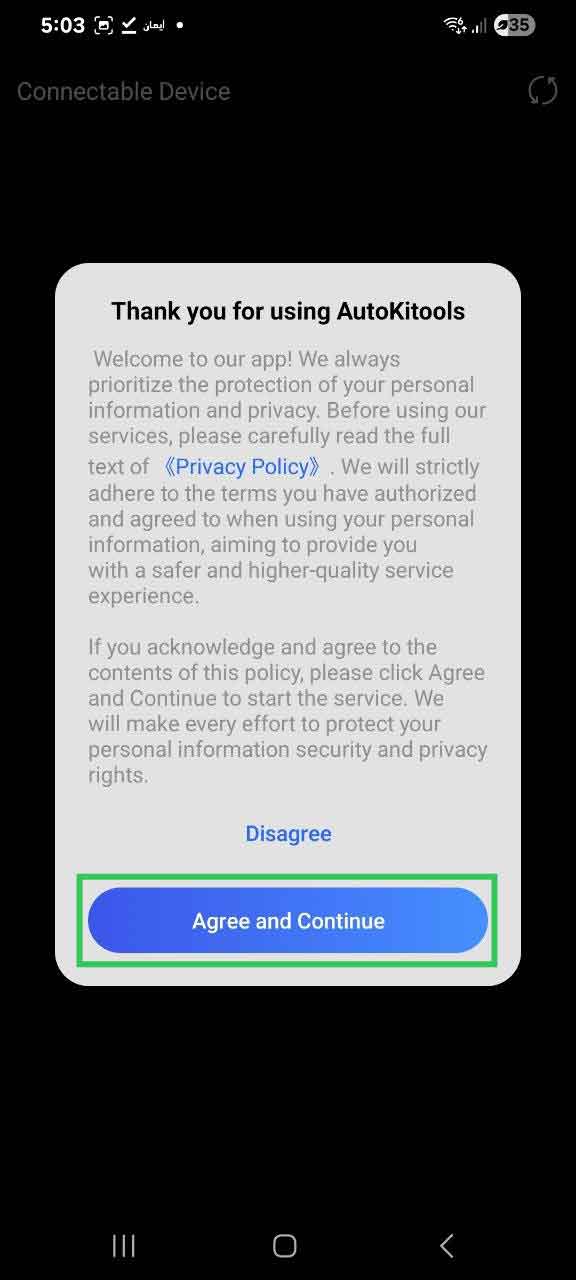
Agree and Continue
On the welcome screen, tap Agree and Continue to accept the terms and proceed into the app.
11
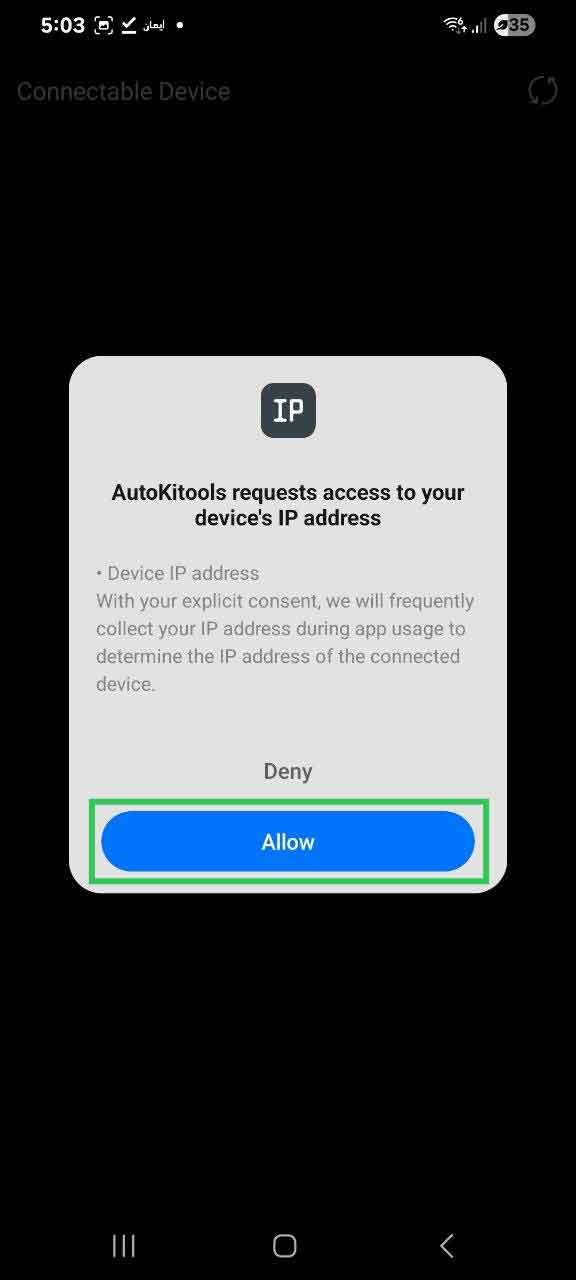
Allow location and Wi-Fi access
AutoKitools will request access to your device's location, IP address, and nearby Wi-Fi networks. These permissions are required to scan for and connect to the dongle. Tap Allow when prompted.
12
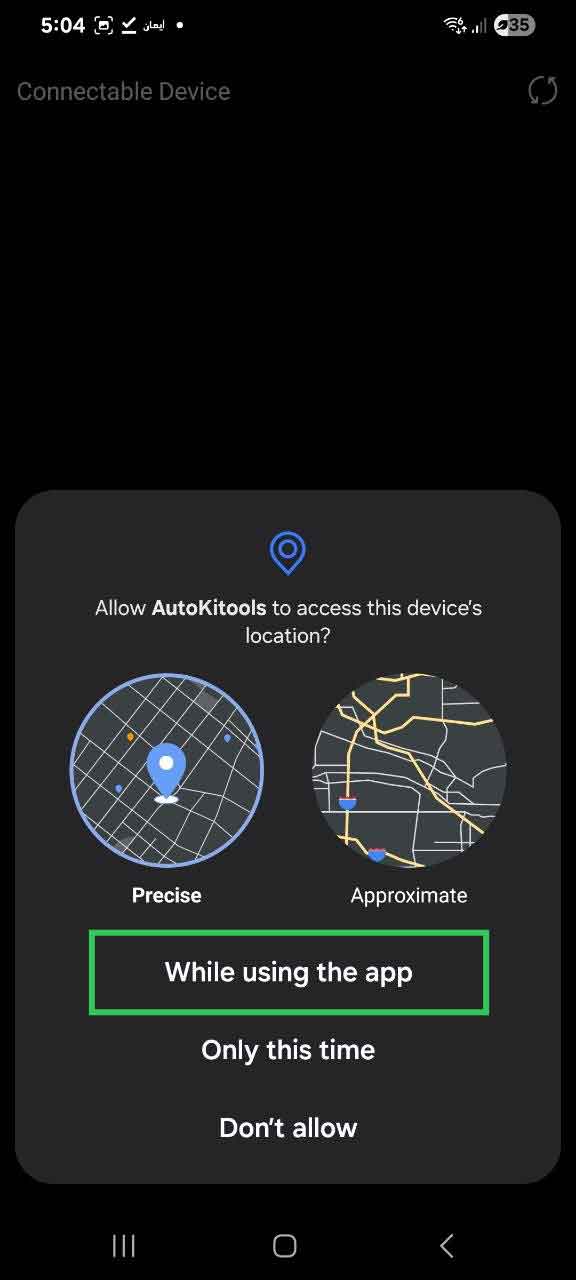
Choose "While Using the App"
A follow-up system prompt will ask how to grant location access. Tap While Using the App to grant permission only while AutoKitools is open. This is the recommended choice.
Part 2 — Power up & connect
13
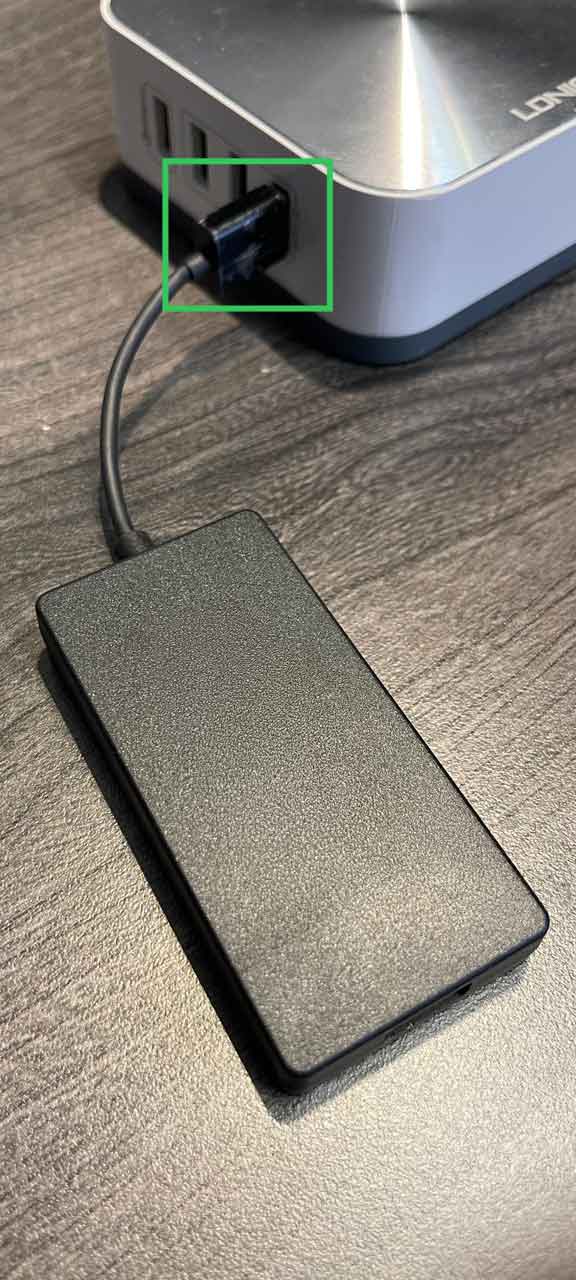
Power up the dongle
Plug your dongle into any USB-A port that supplies standard power — your IHU's USB-A port, a USB wall charger, or a USB hub will all work. Make sure the connection is secure. The dongle will begin its startup sequence automatically.
14
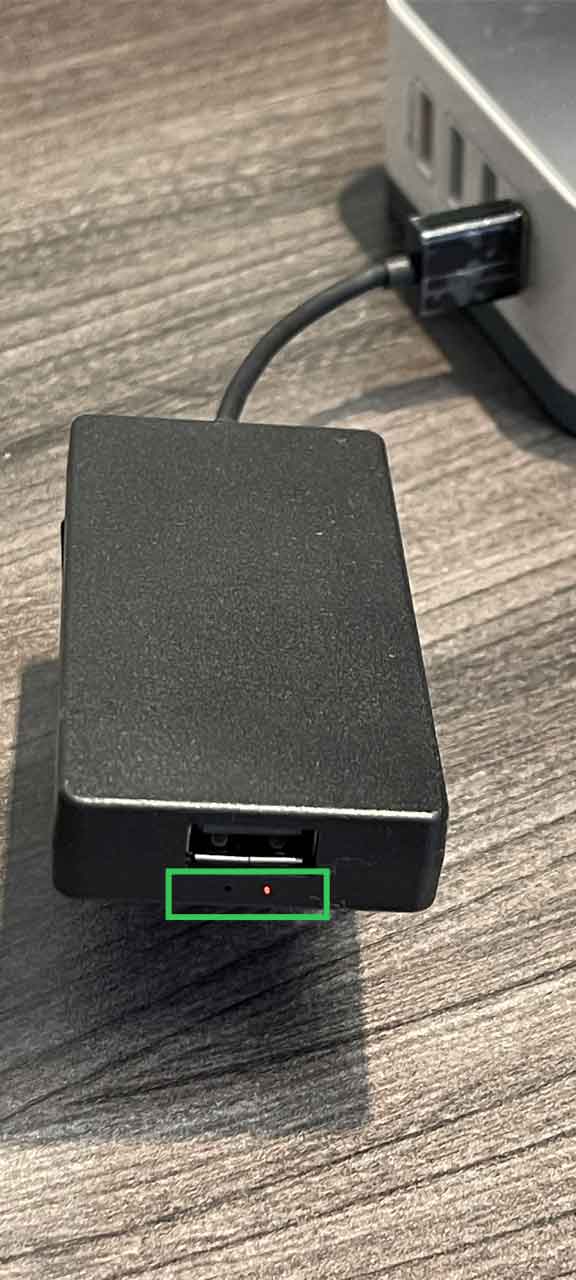
Wait for the red LED
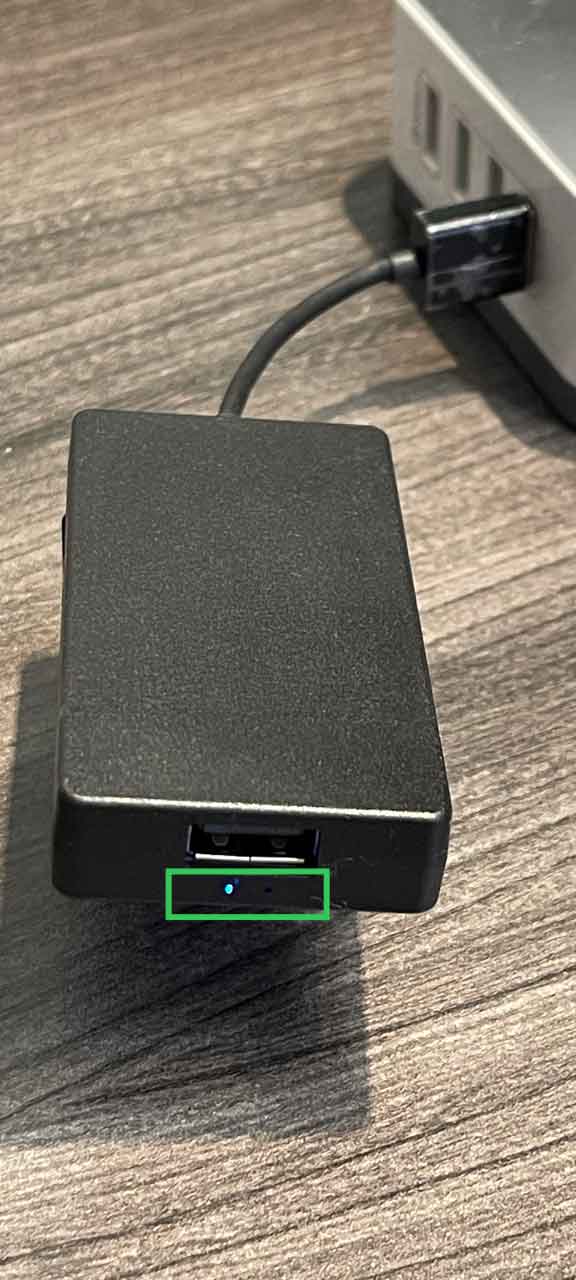
Watch the small LED indicator on the front of the dongle. Wait until it glows a solid, stable red — this confirms the dongle has finished booting and is now broadcasting its own Wi-Fi hotspot. Do not proceed until the red light is steady. It may take up to 30 seconds.
15
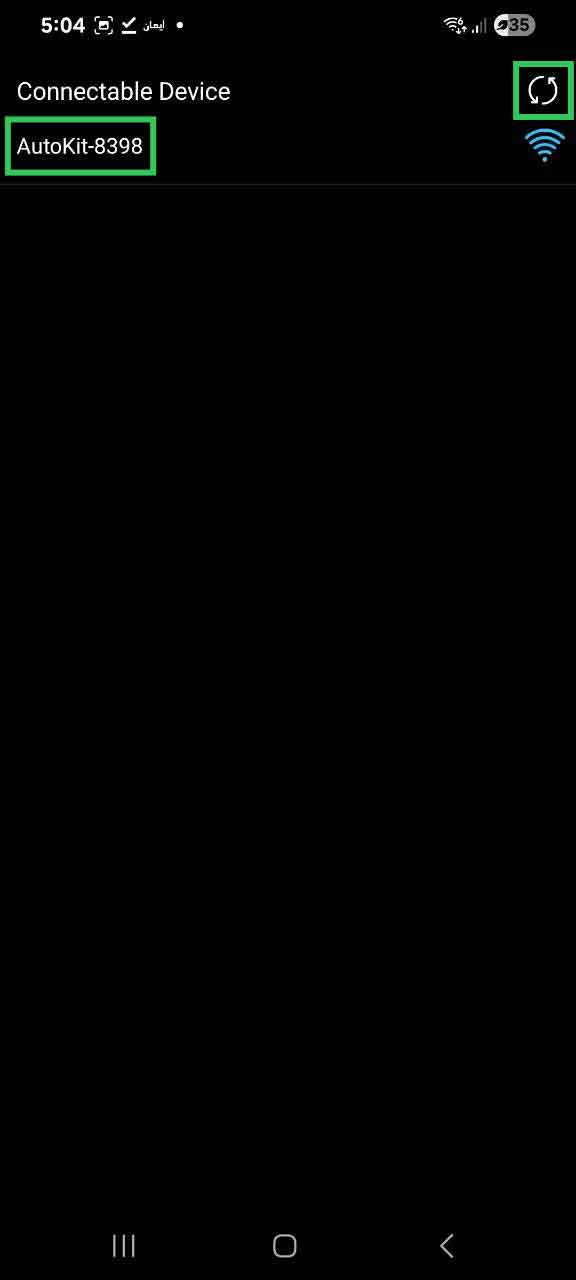
Refresh and select your dongle
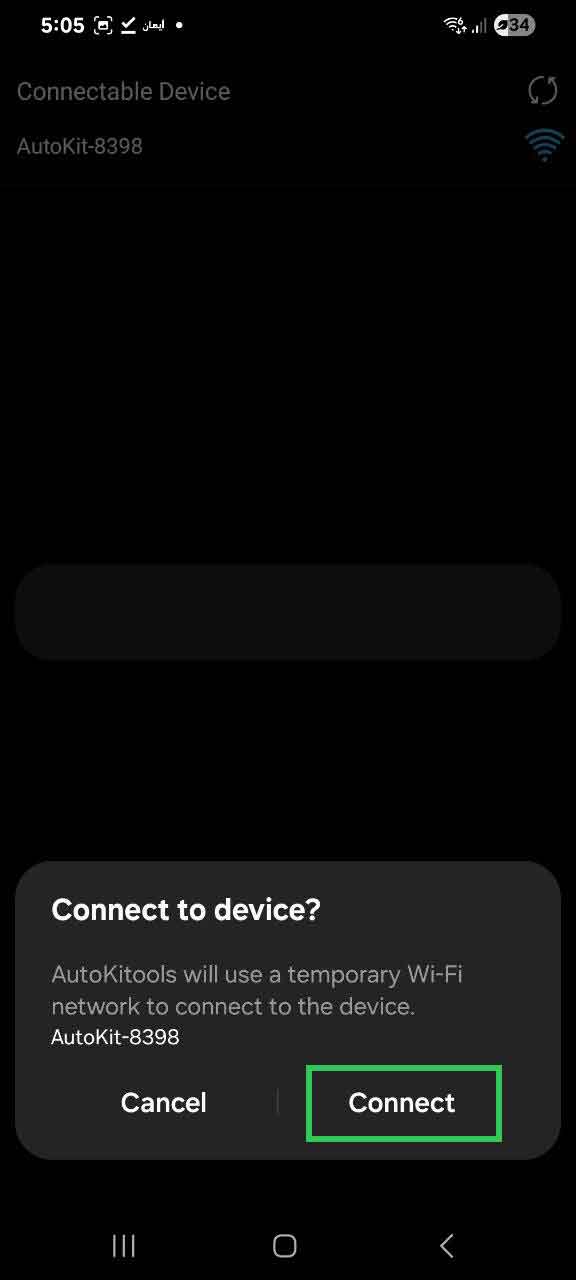
In the AutoKitools app, tap the Refresh icon (circular arrow) at the top-right corner of the home screen. The app will scan for nearby dongles. Your dongle will appear listed as AutoKit- or AutoBox- followed by a 4-digit number (e.g. AutoKit-8398 or AutoBox-8398). Tap it to select it.
16
Tap Connect
After selecting your dongle, tap Connect. The app will establish a Wi-Fi connection between your phone and the dongle automatically.
17
Dongle LED changes to blue or green
Simultaneously, the LED on the dongle shifts from red to blue (or green on some units). This colour change confirms your phone is now connected to the dongle's Wi-Fi and you are ready to access its settings.
Part 3 — Reset the dongle
18
Open the dongle settings tab
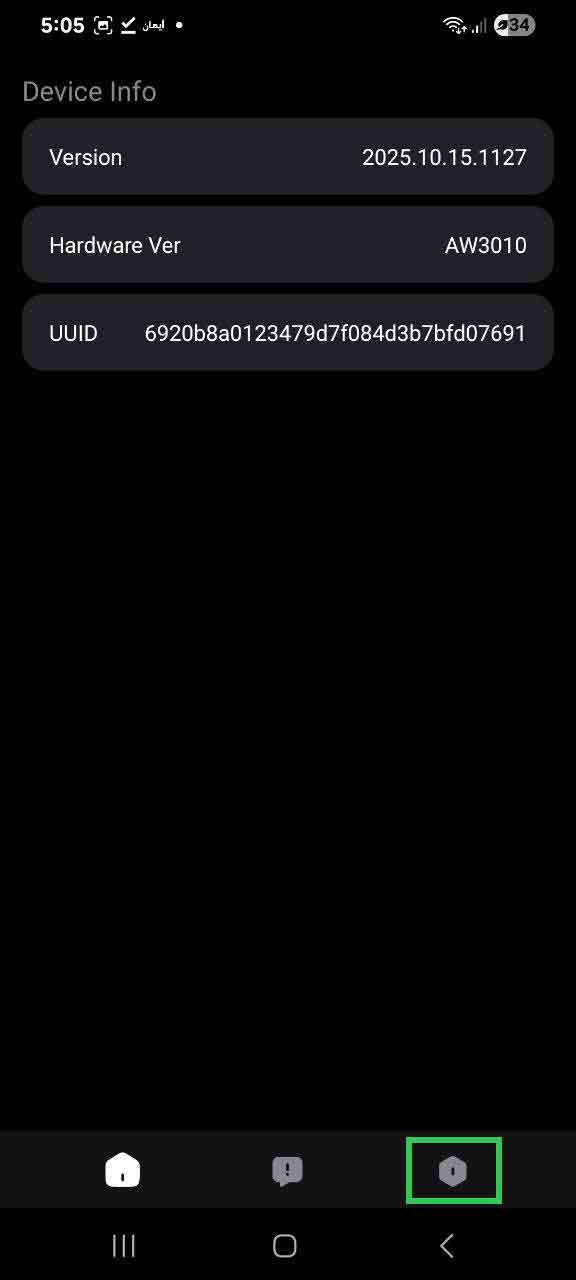
In the AutoKitools app, tap the third icon from the left in the bottom navigation bar to open the dongle's settings panel.
19
Tap Reset
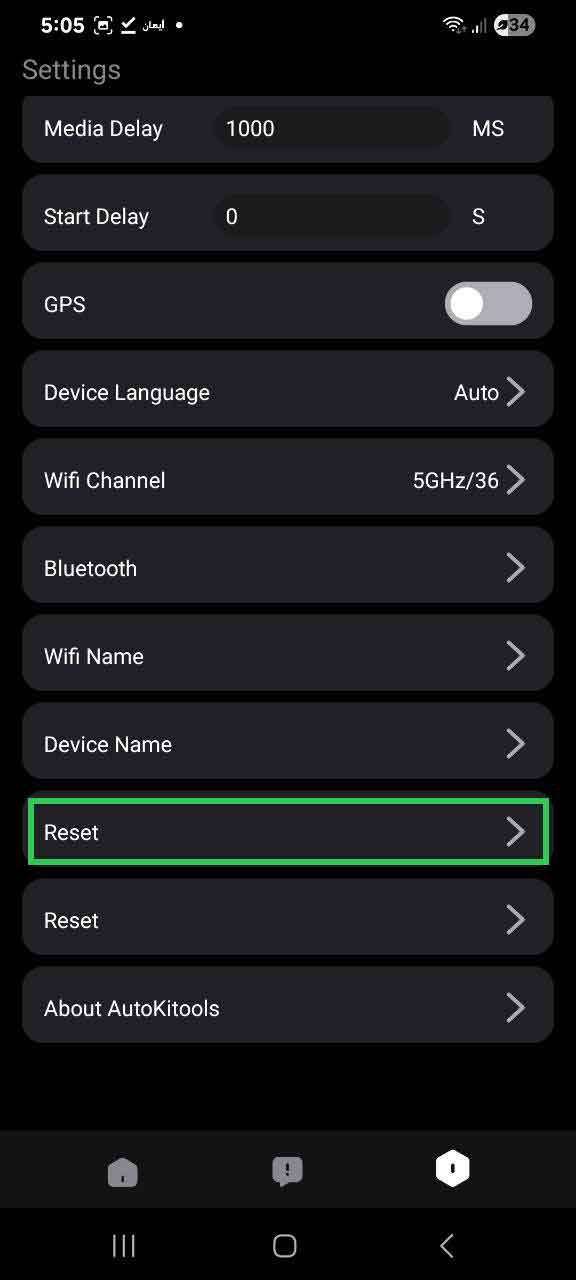
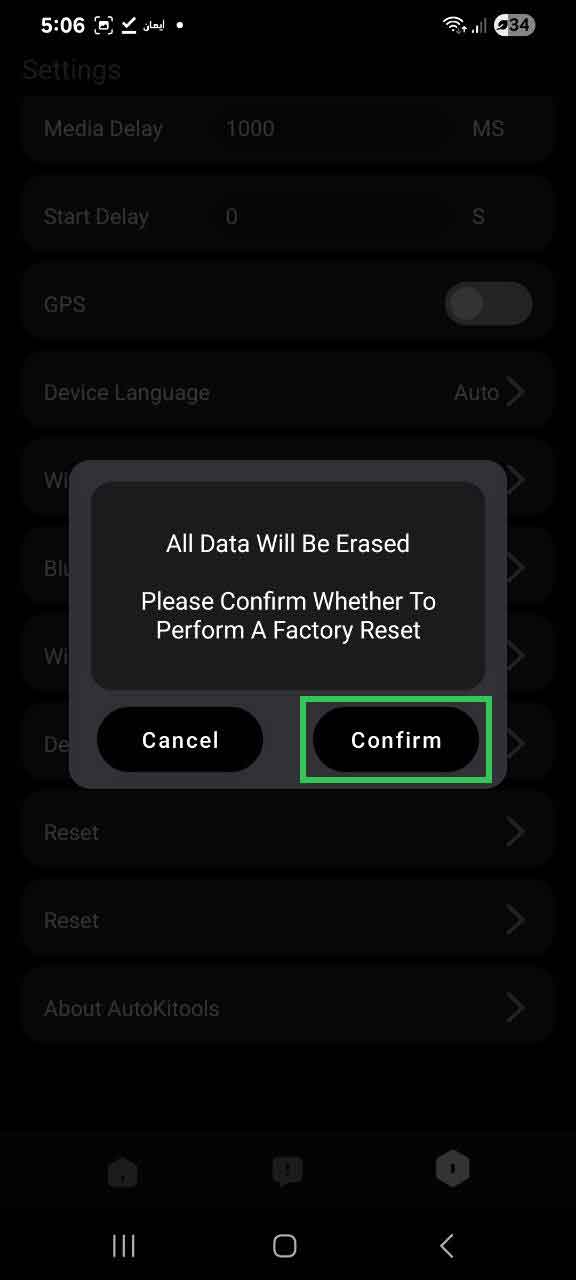
Inside the settings panel, tap Reset to initiate the factory reset. This will clear all paired devices and stored settings from the dongle.
20
Confirm the factory reset
A confirmation dialog will appear. Tap Confirm to proceed. The reset begins immediately.
⚠️Do not unplug the dongle during the reset. Once you tap Confirm, the LED will go dark briefly as the dongle restarts — this is normal. Wait until the red LED is fully stable and solid before removing the dongle from the USB port.
✅Your dongle has been successfully reset. All previous pairing data is cleared. On your next drive, re-pair your phone to the dongle via Bluetooth and Wi-Fi just as you did during the initial setup. Once paired, your AACP connection should work correctly.
Reset completed but the issue persists? Contact us on WhatsApp — describe what's happening and include your IHU Software Version and Proton model.
This website uses cookies, including Google Analytics, to understand how visitors use our site and to improve your experience. By clicking "Accept", you consent to this use. You can withdraw your consent at any time by adjusting your browser settings. See our Privacy Policy for details.